
Introduction
Embroidery and printing are two popular methods of decorating fabrics. They can be used to create a wide range of designs, from simple patterns to intricate artwork. In this article, we will explore the basics of how embroidery and printing are done, as well as some tips for creating your own designs.
1.Embroidery
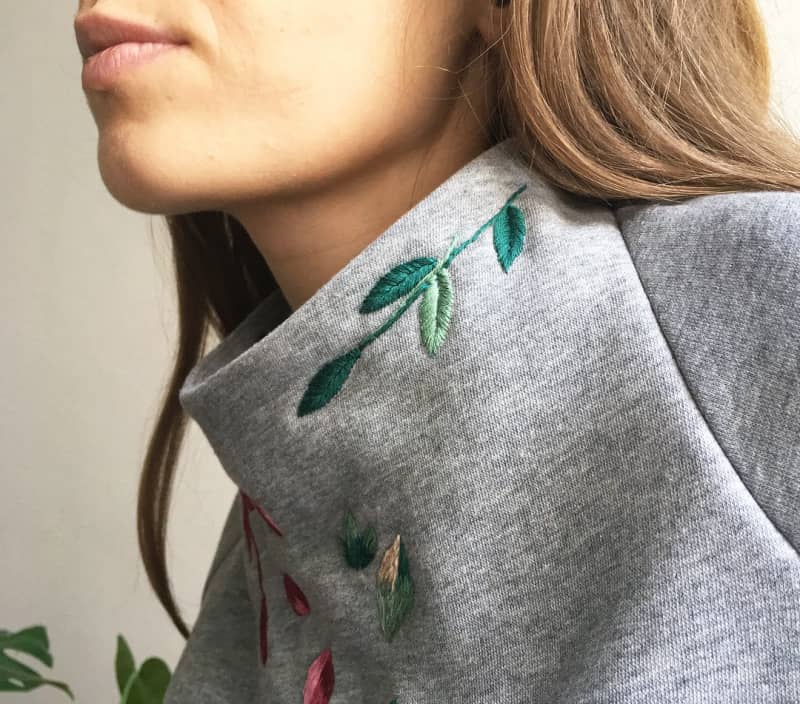
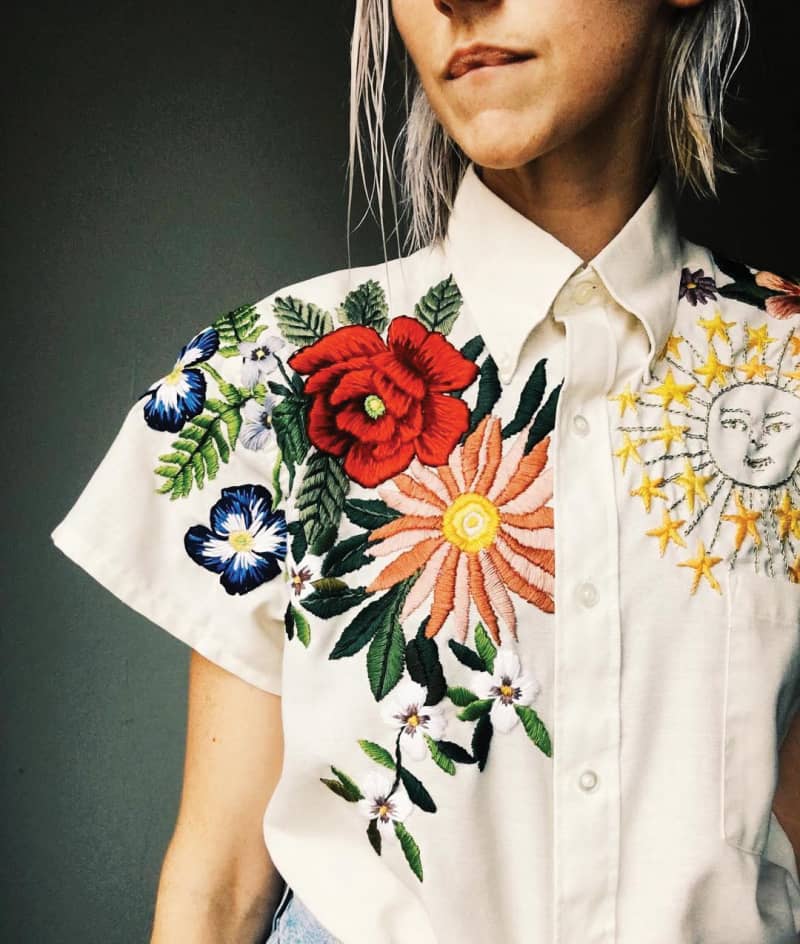
Embroidery is the art of decorating fabric or other materials with needle and thread. It has been practiced for thousands of years, and is still widely used today. There are many different types of embroidery, including cross-stitch, needlepoint, and freestyle embroidery. Each type has its own unique techniques and tools, but they all involve stitching threads onto a fabric base.
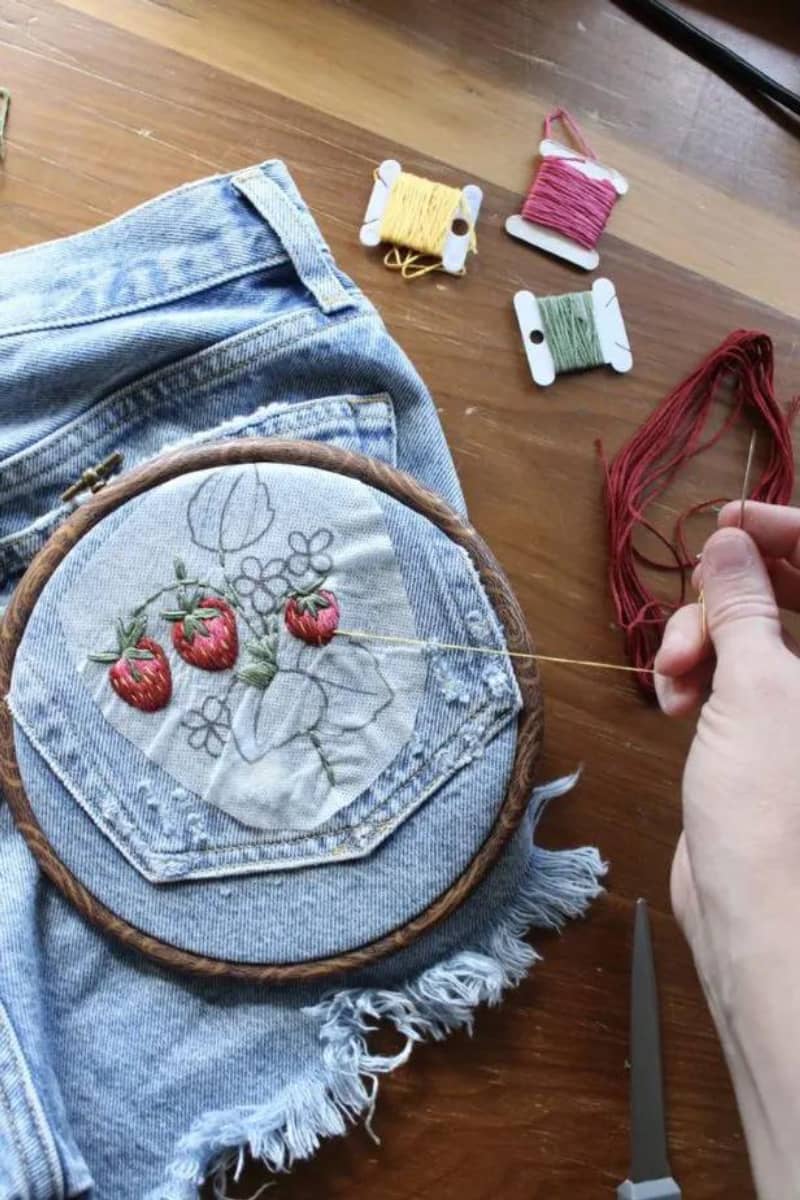
(1)Hand Embroidery
Hand embroidery is a timeless art form that has been used for centuries to decorate clothing, household items, and artwork. It involves using a needle and thread to stitch a design onto a fabric surface. Hand embroidery allows for great flexibility in terms of design, as it can be easily altered or customized to suit the artist's preferences.
To create a hand embroidery design, you will need the following materials:
- Fabric: Choose a fabric that is suitable for embroidery, such as cotton, linen, or silk. Make sure the fabric is clean and dry before starting.
- Embroidery floss: Choose a color that matches your design or adds contrast to your fabric. You can use a single color or multiple colors for your embroidery.
- Needles: Use a needle appropriate for your fabric and thread type. The size of the needle will depend on the thickness of the thread you are using.
- Scissors: Use a pair of sharp scissors to cut your thread and trim any excess fabric.
- Hoops or frames: These are optional but can help keep your fabric taut while you work on your embroidery.
Making hand embroidery involves several steps, including:
To begin, sketch your design onto your fabric using a fabric marker or pencil. You can also print out a design and transfer it onto your fabric using a transfer paper. Once you have your design ready, thread your needle with the chosen embroidery floss and tie a knot at the end.
Next, bring your needle up through the fabric from the back side, close to the edge of your design. Hold the needle parallel to the fabric surface and insert the needle into the fabric at the desired location for your first stitch. Pull the thread through until there is a small loop on the back side of the fabric.
Insert the needle back into the fabric at the same location, making sure to go through both layers of fabric this time. Pull the thread through until there is another small loop on the back side of the fabric. Continue this process, creating small stitches in a pattern that follows your design.
As you work on your embroidery, make sure to keep your stitches even and consistent. You can vary the length and thickness of your stitches to create different effects, such as shading or texture. When you reach the end of your design, tie off your thread securely on the back side of the fabric.
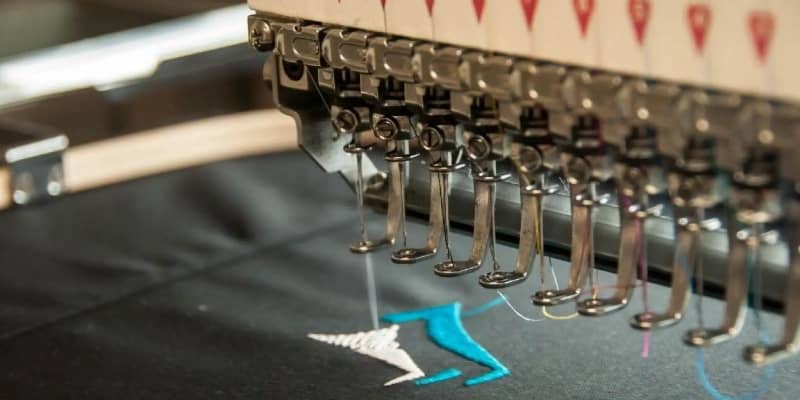
(2)Machine Embroidery
Machine embroidery is a popular method for creating embroidery designs quickly and efficiently. It involves using an embroidery machine to stitch a design onto a fabric surface. Machine embroidery allows for precise control over the stitching process and can produce complex designs with ease.
To create a machine embroidery design, you will need the following materials:
- Fabric: Choose a fabric that is suitable for machine embroidery, such as cotton, polyester, or blends. Make sure the fabric is clean and dry before starting.
- Embroidery designs: You can purchase pre-made embroidery designs or create your own using software such as Embrilliance or Design Manager.
- Embroidery machine: Choose an embroidery machine that is suitable for your needs and budget. Some machines come with built-in designs, while others require you to upload your own designs onto a memory card or USB drive.
- Bobbin: Choose a bobbin that matches the weight and type of thread you are using.
- Spool of thread: Choose a thread that matches your design or adds contrast to your fabric. You can use a single color or multiple colors for your embroidery.
Making hand embroidery involves several steps, including:
To begin, load your fabric into your embroidery machine and adjust the hoop according to the size of your design.
Next, load your bobbin with the chosen thread and secure it in place. Load your spool of thread onto your machine and adjust the tension as needed.
Once your machine is set up, upload your embroidery design onto the machine's memory or USB drive. Follow the machine's instructions to select and start your design. Your machine will automatically stitch your design onto your fabric according to the specified settings.
As your machine stitches your design, make sure to monitor it closely to ensure that it is stitching correctly and not getting tangled or caught on anything. If you encounter any issues, refer to your machine's manual for troubleshooting tips.
When your design is complete, remove your fabric from the machine and carefully remove any excess threads or stabilizer material. Trim any loose threads and admire your finished embroidery!
2.Printing
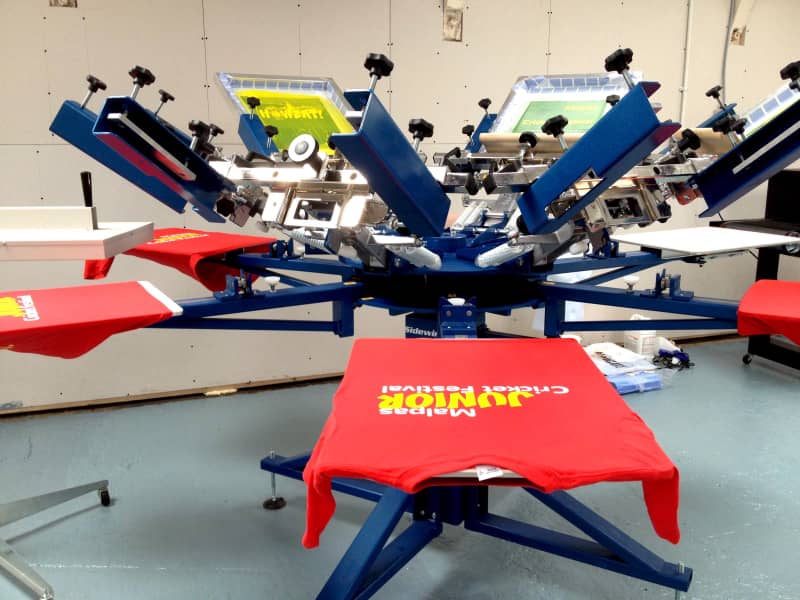
Printing is another popular method of decorating fabrics. There are many different types of printing techniques, including screen printing, heat transfer printing, and digital printing. Each method has its own unique advantages and disadvantages, so it is important to choose the right one for your project. Printing includes screen printing(It involves creating a stencil of the design using a mesh screen, then pressing ink through the screen onto the fabric. Screen printing is ideal for large quantities of fabric, as it allows you to print multiple designs at once. However, it can be time-consuming and requires specialized equipment and training.), heat transfer printing(It involves using a special printer to apply heat-sensitive ink onto a transfer sheet, then pressing the sheet onto the fabric to transfer the design. Heat transfer printing is ideal for small quantities of fabric, as it allows you to print individual designs quickly and easily.), digital printing(It involves using a digital printer to apply ink directly onto the fabric, allowing for high-quality prints with a wide range of colors and designs. Digital printing is ideal for small to medium-sized projects, as it allows you to print individual designs quickly and easily.) and so on.
To begin a printing project, you will need several things:
- Substrate: Choose a substrate that is suitable for screen printing, such as cotton, polyester, or vinyl. Make sure the substrate is clean and dry before starting.
- Screen mesh: Choose a screen mesh that is appropriate for your design and ink type. The mesh size will determine the detail level of your print.
- Ink: Choose an ink that is compatible with your screen mesh and substrate. You can use water-based or plastisol inks depending on your needs.
- Squeegee: Use a squeegee to apply ink through your screen mesh onto your substrate. Choose a squeegee with a flat edge for straight lines and a round edge for curved lines.
- Exposure unit: Use an exposure unit to expose your screen mesh to light, which hardens the emulsion and creates a negative image of your design.
- Solvent: Use a solvent to wash away the unhardened emulsion from your screen mesh after exposing it. This leaves behind a positive image of your design on the mesh.
- Tape: Use tape to secure your screen mesh onto a frame or tabletop before exposing it to light.
Making printing involves several steps, including:
1. Designing the artwork: The first step in making clothes printing is to create a design or artwork that you want to print on your clothing. This can be done using graphic design software like Adobe Illustrator or CorelDRAW.
2. Preparing the fabric: Once you have your design ready, you need to prepare the fabric for printing. This involves washing and drying the fabric to remove any dirt or chemicals that may interfere with the printing process. You may also need to treat the fabric with a substance called "pre-treatment" to help the ink adhere better.
3. Printing the design: The next step is to print the design onto the fabric using a heat press or screen printing machine. Heat press printing involves pressing a heated metal plate onto the fabric, while screen printing involves pushing ink through a mesh screen onto the fabric.
4. Drying and curing: After printing, the fabric needs to be dried and cured to ensure that the ink sets properly. This can be done by placing the fabric in a dryer or leaving it to air dry.
5. Cutting and sewing: Once the fabric is dry and cured, it can be cut into the desired shape and size for your clothing item. The pieces can then be sewn together using a sewing machine or by hand.
6. Quality control: Finally, it's important to perform quality control checks on your printed clothing items to ensure that they meet your standards for appearance, fit, and durability. This may involve inspecting the prints for accuracy, checking the seams for strength, and testing the fabric for colorfastness.
Conclusion
In conclusion, making embroidery or printing involves several steps, from choosing the design and transferring it onto the fabric to selecting the appropriate thread or ink and stitching or printing the design. With practice and patience, you can create beautiful and unique pieces of art that showcase your creativity and skill.
Post time: Dec-08-2023


